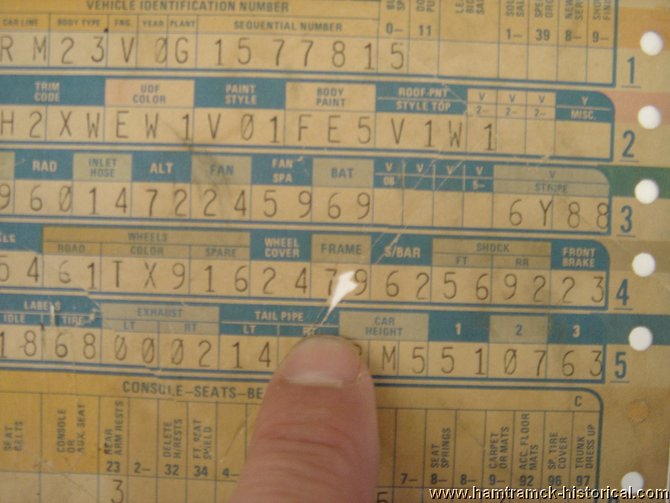
|
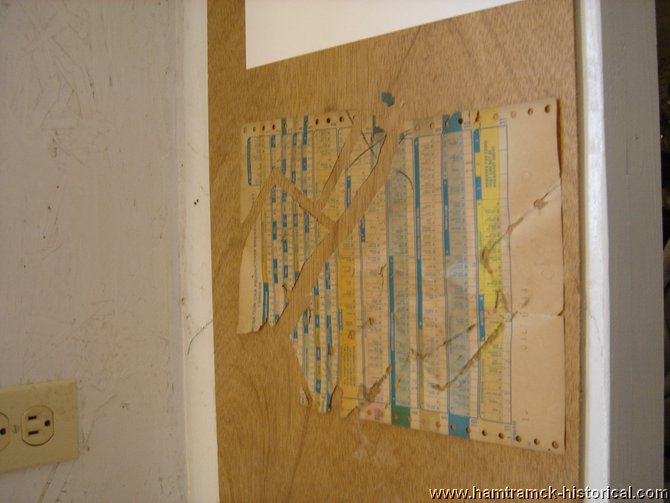
I get asked about this every so often, so
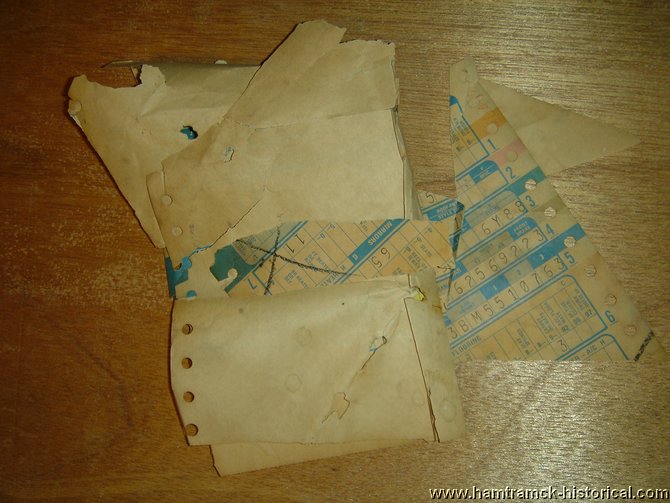
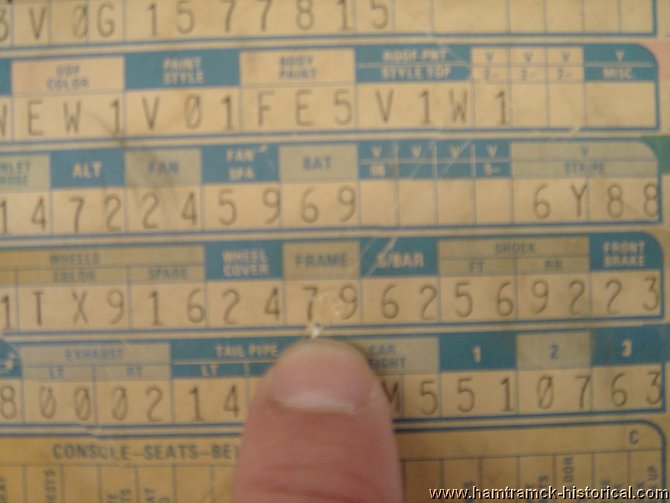
when Ryan Stevens sent in this mangled broadcast sheet for
the ‘found’ section I decided to use it for the
basis of this article. This is what we are starting with,
what a mess;
Save all the pieces you can for starters,
even the tiniest scraps. Roughly assemble them where they
go.

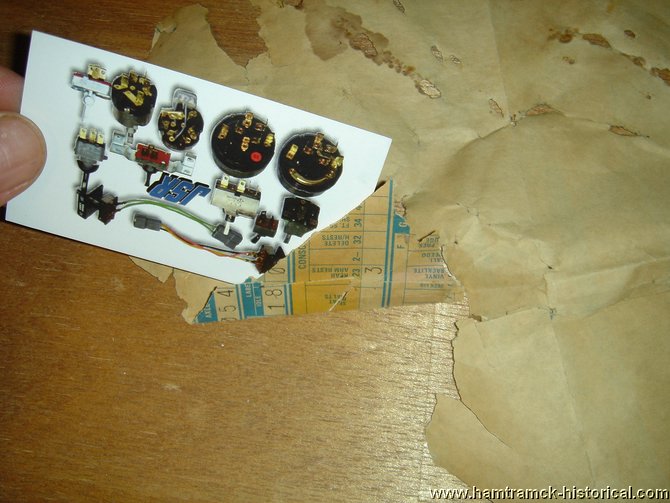
Notice that some areas have folded over, you
will need to gently fold them back in place. Even my bony
fingers were too fat for this, so I used a business card.
Slip it under the edges & gently fold them over.
Look for small sections like this & fold
them over as well. It they break off, make a mental note
of where they go, or take photos as you go.
Once you have that taken care of, reassemble
the bits & pieces about where they go and press them
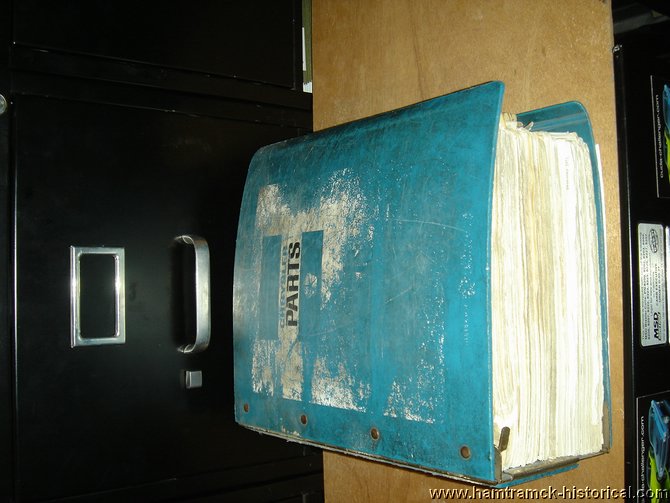
flat with something heavy for a while. My 1970-71 parts
book works great for this.
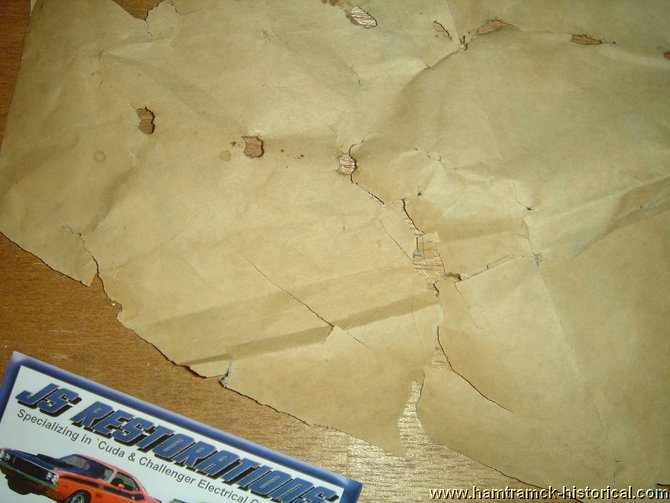
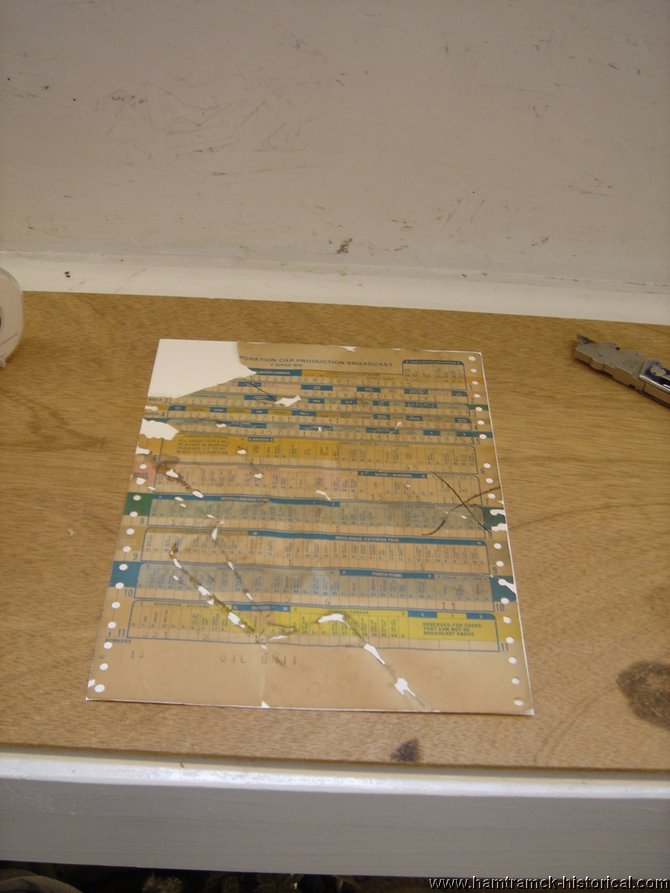
Even after pressing, this one was still pretty
lumpy, so I VERY carefully ironed it with a steam iron.
Go easy on the heat & pressure here or you can wipe
the poor battered thing out for good! Here is how it looked
after ironing;
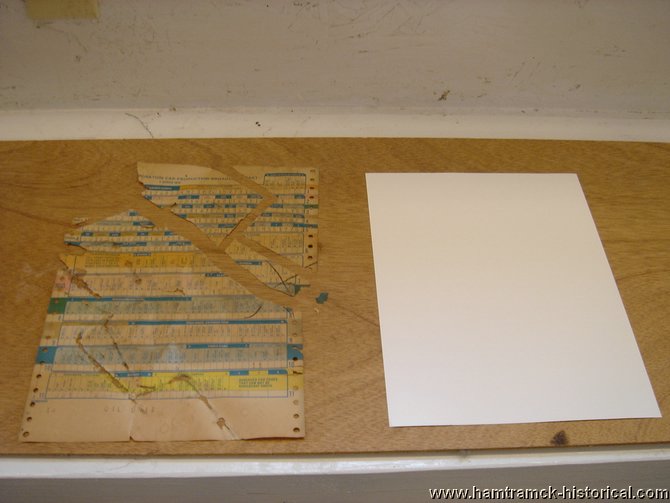
Now comes the fun part, final assembly. For
this stage you need a backer sheet the same size or slightly
larger than the broadcast sheet. You want something stiffer
than a normal sheet of paper. Transparency sheets work fine,
so does photo paper as shown here.
You will also need some double sided sticky
tape, I use Scotch brand removable double coated tape. It
has a ‘soft stick’ so if you make a mistake you
can gently peel the original up & adjust it. Flip the
largest section of the broadcast sheet over & use small
sections of this tape in the areas that are split &
torn. Try to get it right the first time, every time. Some
sheets are so brittle that you do risk damage if you have
to make a correction, so be patient & take your time.
Once you have the tape in place, carefully align the corner
of the sheet with the corner of the backing paper. This
part is critical - align the edges well or you may be off
the edge as you add the smaller pieces and work out.

Once you have that done, start filling it
in with the small pieces.
You may have some tiny bits like these two
rascals, they broke off when I tried to fold them over in
one of the earlier steps.

They both go here;
These are too small for tape to be practical,
so for this use Elmer’s white glue. Use the tip of
a pin or paperclip, dip it in a bead of glue then carefully
spread it on the backer sheet where you need it. Then carefully
bed the tiny bits in the glue where they go, use tweezers
if needed.
Once the glue dries, that is it, you are done!
You can make photo copies or scan it into your computer
as needed for reference at this point. Then slip the broadcast
sheet & backing paper into a sleeve protector before
you file it away for safe keeping.
Thanks for sending it in Ryan! It will be
the Item of the Month for October 2010.
Barry Washington
|