|
Used original radiator shrouds for our old
cars are not always easy to find when needed. I found this
one at the Carlisle swap meet & fortunately, the seller
had two to choose from, so I picked the best one. Our victim
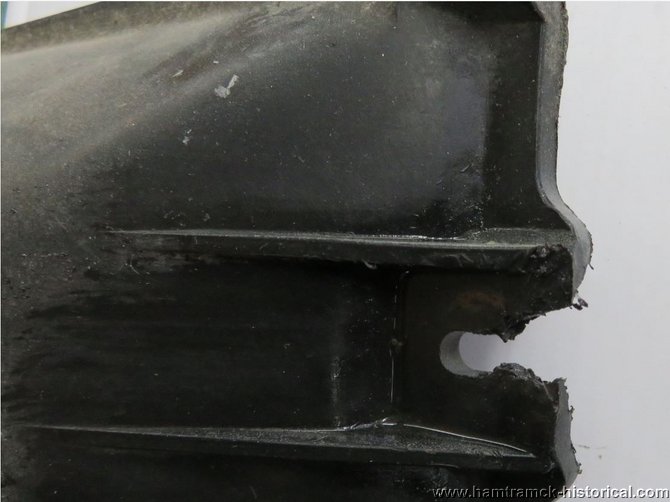
today is part number 2998326 which is 'correct' for several
1970 B & E-body models with a 26" radiator.
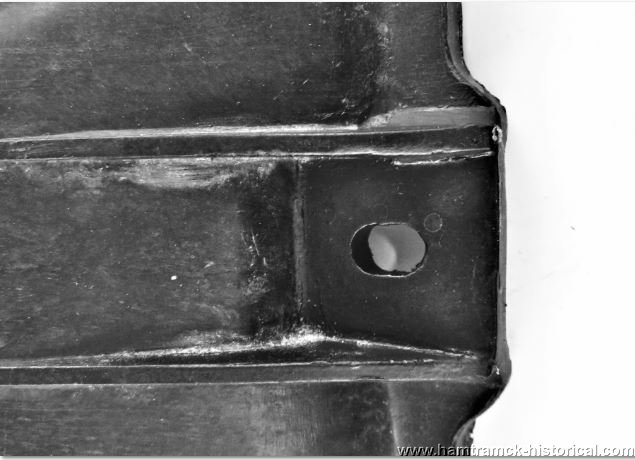
As you can see here, it had one upper mounting
ear that was damaged.
This was easily repaired with basic tools
& some commercial products. Household clothes pins can make
great clamps for small projects like this, here they have
had the spring position changed into a 'needle nose' application
for a deeper reach. I cleaned up the rough edges & loose
material on the shroud away with a razor knife, then sprayed
the section with lacquer thinner to clean it.

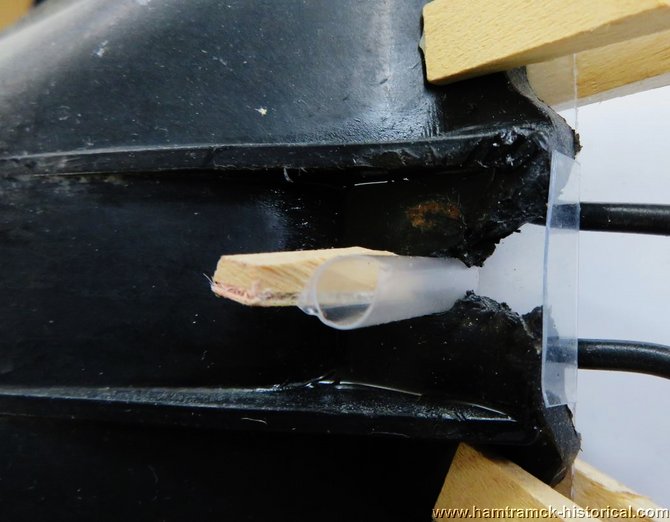
This two part plastic welder will NOT bond
with ALL plastics & this is a good thing. One of those plastics
is the type found on some food container lids, like margarine
as one example. So I save the lids for 'flat stock' to cut
up & use for forms as shown below. I cut this one to size
& then scored a straight line across it with a razor knife
& then bent it at the line to create a sharp corner for
the bottom of the non-stick form.
The oval hole outline was easy to preserve
with a short section cut from a common drinking straw, I
used a wooden wedge to keep it tight to what was left of
the missing side of the oval hole. The modified clothes
pins hold the form in place so the plastic welder has a
non-stick bottom & side to hold it in place until it sets
up.
The plastic welder has two parts that need
to be mixed well, seen here after mixing it & using it to
fill the form.
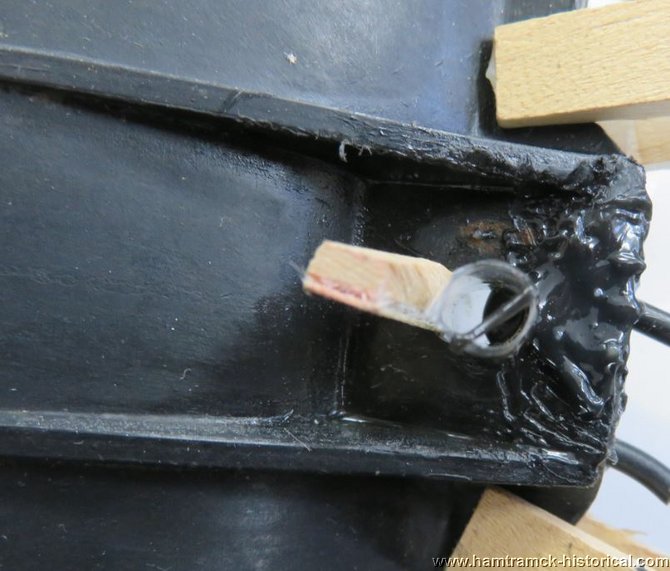
It takes a few minutes for the plastic welder
to set up, so if you keep an eye on it you can easily slice
it with a razor knife while it is setting up to remove any
excess. Once it fully hardens it is not easy to cut! I left
the form in place to trim the excess.
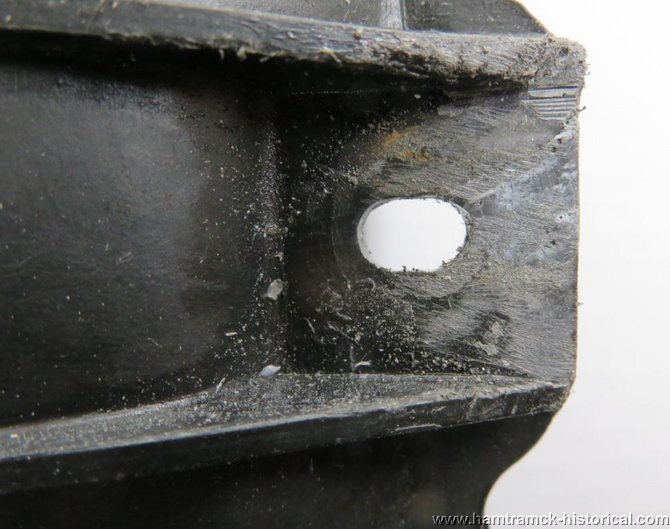
This photo shows it after the first application
with the form & straw now removed. It was trimmed some more
with the form out of the way & then rough sanded.
After that, I mixed up a little bit more of
the plastic welder to fill in an air pocket in the back
side & by using another section of food container lid as
a tiny squeegee I applied a thin layer over the top to help
fill in the low areas. Repeat that step as needed. (it took
4 applications to get this one right where I wanted it to
be) After that set up, I sanded it smooth with 220 grit
sand paper & then filled the sanding marks in with the glazing
putty. After the putty set up, a final scuff with a Scotchbrite
pad to smooth it out. The glazing putty is red, so I masked
the repaired area carefully & then sprayed it with a flat
black. After the black paint dried, I sprayed the repair
with a satin clear & now it is all done!
One quick & easy project that can be done
in a day even with the curing & paint drying times factored
in!
|